[MoPi is mobile, hot-swap and 24/7 power for the Raspberry Pi.
How to order.]
Contents
1. The View from the Pi
The MoPi software suite is now feature complete. That means that all the facilities which MoPi makes available on the Raspberry Pi which it is powering are now available for testing. This post describes how this software works and how the architecture of MoPi hangs together.
There are four main parts of the puzzle:
- A daemon which runs in the background on the Pi, which is called SimBaMon (a Simple Battery Monitor). SimBaMon is available as a package for Raspbian, and installing it pulls in all the other facilities.
- An interface that communicates with the MoPi hardware over the I2C protocol. This interface is wrapped up as a Python API.
- A command-line tool that uses the Python API and provides a language-neutral portable method for talking to the board from the Pi.
- A configuration user interface that simplifies the process of setting up MoPi to deal with different types and numbers of batteries, and other types of power supply.
All of the code for these components is available on GitHub, and details of how to install are available on our download page. (Note: to run the current version of the code you need the snapshot repository; the version in the Pi Foundation's repository won't be updated until we make an official release.)
The rest of the post discusses each of the main elements in turn, and finishes up with a note about monitoring the beast as it runs. First, though, a note about our delivery schedule. Having lost some time through illness, and spent quite a long time getting the I2C protocol to work reliably, it is now looking unlikely that we'll deliver before next month. (On the up-side that means we'll be able to deliver all in one go, as the second shipment of microncontrollers is due early in June.) We're getting close to finalising version 4 (the first production version), but we'd hate to ship it with a firmware bug that would mean returning the boards for re-flashing. We hope you agree it is best to wait a little longer. With a bit of luck this will be the last of the delays, and we'll hit the original target of June 2014 to finish all deliveries as promised.
2. The SimBaMon Daemon
When the Pi (or any other Linux system) boots, several system services are started that will run continuously until the machine is shut down again. These services are called daemons, and this is how SimBaMon is implemented. Following the standard naming convention, the daemon is called simbamond, and the first point of entry (used by the operating system to start, stop, etc.) is a script that lives in /etc/init.d/simbamond. This script (which is a management type person) calls another to do all the real work; this other (hard working type) lives in /usr/sbin/simbamon.
One of key features of MoPi is that it supports many different types of batteries and many other types of power supply (from solar panels to elastic bands!). Coping with the requirements of all these monsters needs a huge wodge of configuration data, which (following Debian Linux convention) lives in /etc/default in a file (again, confusingly) called simbamond.1
Together these three script files make up a new system service that polls the MoPi hardware every couple of seconds and shouts loudly when an electron shortage appears on the horizon. If no one is listening and the shortage gets acute, the daemon tells the Pi to take a rest and issues the shutdown command.
There is more detail here (though it is a little out of date at time of writing).
3. The Python API
How do we talk to the hardware? From MoPi version 3 onwards we shifted away from using the Pi's general-purpose GPIO pins (using a tool called WiringPi). This worked well, but it used a pin for each bit of data that we wanted to ship between the board and the Pi. As time went on we found more and more data that we needed to share (and we also came across other add-on boards that use lots of GPIO pins — e.g. AirPi).
Luckily the Pi also hosts several other inter-board communication options, including the I2C protocol, which uses only two pins, can talk to multiple devices over the same two wires, and allows transfer of much larger amounts of data.
There are two ways to talk over I2C from the Pi: a set of command-line tools written in C, and a Python module. Both work, but the Python version seems to have had more attention from Pi users and developers, and has support for multi-byte reads (which requires a bit of hacking to get working in the C). So we've implemented an API for MoPi in Python2, which now lives in a file called mopiapi.py.
For Python programmers this code provides a natural and efficient method of including MoPi facilities in their programs.
4. MoPi from the Command Line
The observant amongst you may have noticed that SimBaMon is not written in Python3 — how does the daemon talk to the board when the API is in Python? That's where mopcli comes in, which is a command-line interface to the Python API. This script provides convenient methods for the daemon to use, or for Pi users to query and configure the board, or for our configuration utility — which by amazing coincidence is described next.
To see what the beast can do, ask it for help by typing sudo mopicli -h; you'll get something like this:
Usage: mopicli [-h] [options]
Version 0.2, API 0.2

Miscellaneous:
  -i          I2C bus (default: 1)
  -fv         Firmware version
  -sn         Serial number
  -h          Display this message

Status:
  -s          MoPi status word
  -sv         Verbose status
  -v          Current battery voltage in mV
  -v1/-v2     Battery #1/#2 voltage in mV

Read configuration options:
  -rc         Combined battery #1 and #2 configuration
  -rc1/-rc2   Configuration of battery #1/#2
  -rpon       Power on delay
  -rs         Shutdown delay

Write configuration options:
  -wc mV mV mV         Combined battery #1 and #2 configuration
  -wc1/-wc2 mV mV mV   Configuration of battery #1/#2
  -wpon seconds        Power on delay seconds
  -ws seconds          Shutdown delay seconds

All options may be used simultaneously. When doing so, they execute in the
  order they are listed in in this help message. However, only one of each may
  be used.
As easy as pie.
5. Configuring Your Power Supplies
Not quite so easy is choosing the correct voltage settings for different battery chemistries and different combinations of cells (not to mention other types of power supply). In each case MoPi needs to know:
- what is the approximate voltage that the battery will supply when fully charged
- what is the point at which we're getting low on charge (and may expect to run out within a few minutes or so)
- what is the minimum safe discharge voltage
The mid-point between the first two voltages is is the conventional definition of what a good level of charge is, so that's where we swap between lighting up our RGB led in blue and lighting it in green. When we reach the low charge point we turn the LED red, and when we reach the minimum safe discharge voltage (or the minimum safe operating voltage if that is higher) then we initiate shutdown.
Let's look at each of these values in more detail:
- Fully-charged voltage. This is equal to the fully-charged voltage of each cell in the battery pack multiplied by the number of cells. Like most things with batteries, it varies according to battery chemistry — e.g. an Alkaline cell generates 1.5V; a NiMH 1.2V; a LiIon 3.7V.
- The low charge level. When you record the voltage delivered by a battery over time, most of the curves exhibit a knee shape. Before the knee voltage drop is reasonably slow; after the knee if drops much more sharply. We need to try and warn the user around the knee point, so that they have enough time to replace the battery before it drains completely, but not so much time that there is still lots of usable charge left.
- Minimum safe discharge voltage. This applies to all rechargeable batteries. If we discharge below this level, then the capacity to recharge will be impared. This makes it a very important factor in battery life for the long term, and one which we've done a lot of work to model and adapt to. (Ever wondered why the rechargeables that you put in your alarm clock or torch lasted such a short time? Most devices have no way of knowing about the minimum discharge level for the particular chemistry you're using!)
- Minimum safe operating level. MoPi uses a sophisticated microcontroller to analyse battery behaviour, control its LEDs and deliver data to the software suite running on the Pi. If the supply voltage to MoPi falls below a certain level (around 6.2V) then the microcontroller may terminate, or even start to behave unpredictably. It is very important to trap rapid voltage drop before it reaches this point.
To deal with all these considerations, the current version of the software stores these values:
        TYPE         CELL/FULL  MIN

  1     non-battery     9.0     6.2
  2     NiMH            1.2     0.95
  3     Alkaline        1.5     0.8
  4     Lead Acid       2.0     1.58
  5     Lithium Ion     3.7     3.0
  6     LiPo            4.2     3.0
  7     NiCd            1.2     1.1
When we know what chemistry we're dealing with, and how many cells, we can then make good guesses about where the four levels above should fall. But how do we know what the chemistry is? Two ways:
- We have two built-in defaults, one for 8 NiMH cells (which is the battery pack that we're supplying to backers who requested one), and one for 8 Alkaline non-rechargeables. The former is what MoPi will assume when running out of the box; the latter is activated by removing the on-board jumper provided for the purpose4.
- You tell us! To this end we have developed a configuration UI on the Pi, which is the last piece in our four part software puzzle.
The configuration UI uses the same tools as the Raspberry Pi's utility (raspi-config), so it should be simple and familiar, and it can be used over all types of connections (including remote login with ssh). Here's a screenshot or three:
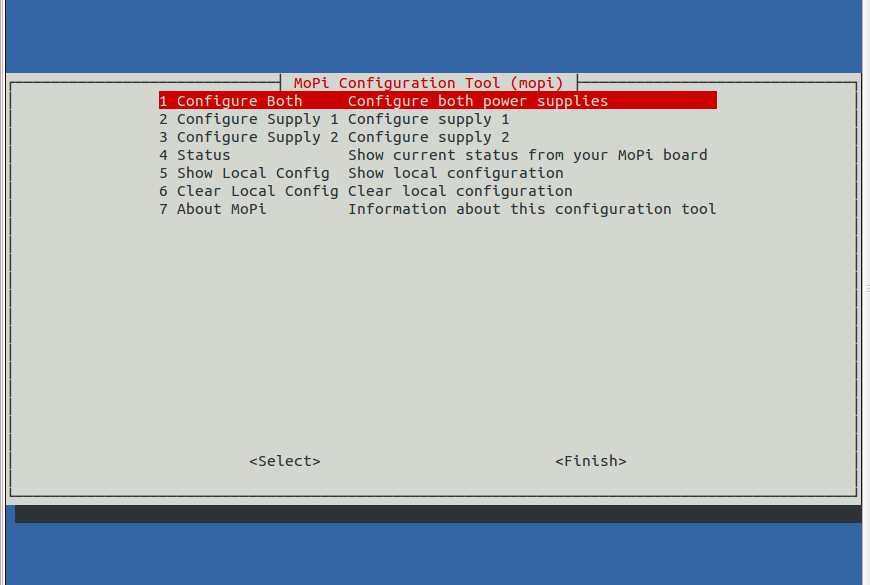
The main entry screen.
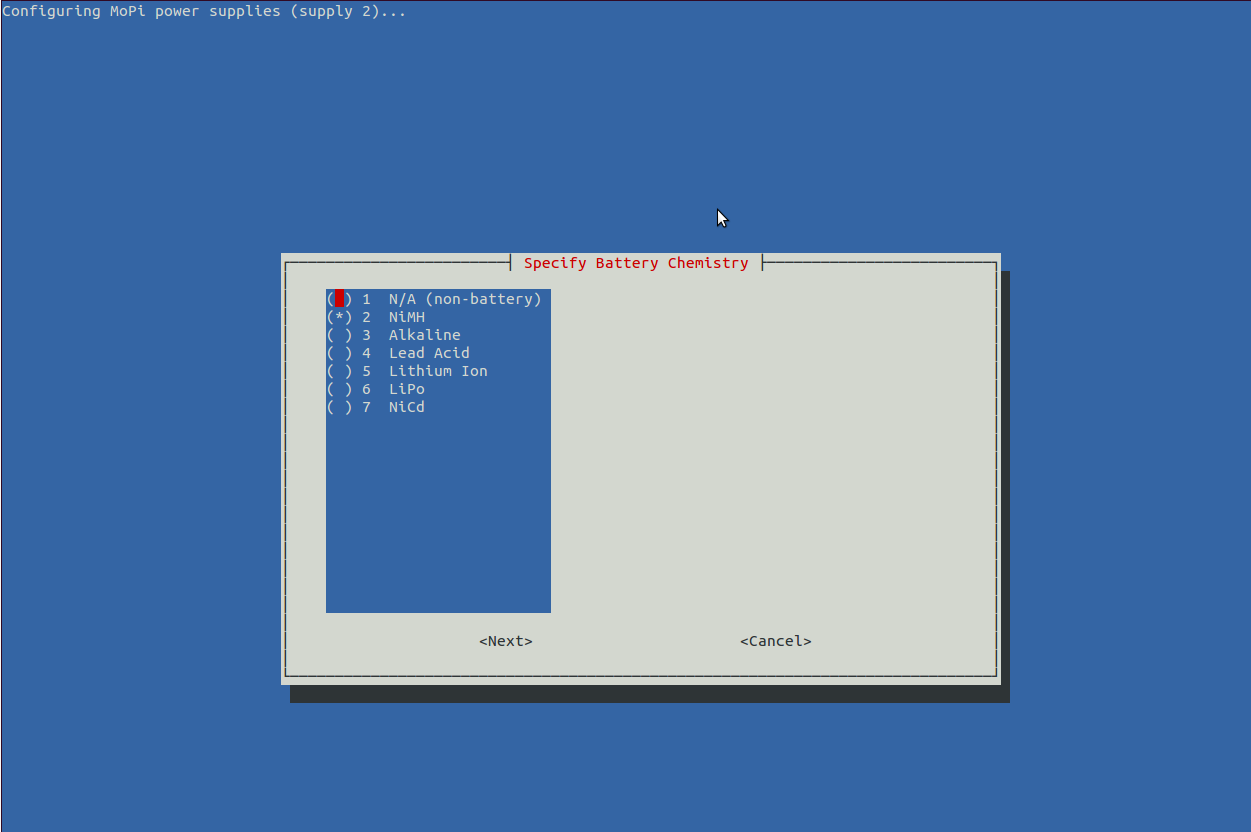
Configuring one of the power supplies, battery chemistry.
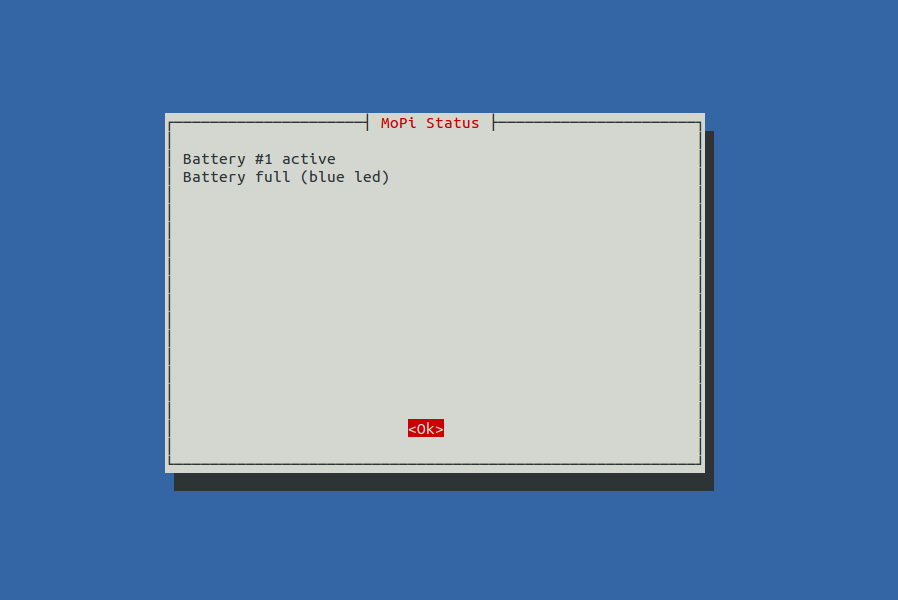
Getting status data (there's lots more in the newest version!).
Dive into the source code here.
And now you know more about batteries than you ever wanted to — just like me!
6. Monitoring
As you can imagine, figuring out how all this stuff is working and identifying bugs and incorrect behaviour is quite a challenge. Luckily we have some great tools to help us, one of which is Monit. This little gem is itself a daemon, and it has facilities for one thousand and one different types of monitoring task. You can listen to your webserver and restart it if it fails, or check the general load of the machine you're running on, or — in our case — check that the SimBaMon service is running, and if not start it up.
To use it, all we need to do is sudo apt-get install monit in the usual way, then edit /etc/monit/monitrc. This is the config we're using to monitor SimBaMon on one of our test rigs:
###############################################################################
# monit config for simbamond, from /etc/monit/monitrc #########################

# monitoring UI (serve on port 8888 and allow connections from one IP address)
set httpd port 8888 and
  allow 192.168.1.111

# general system status
check system mopi-15
  if loadavg (1min) > 4 then alert
  if loadavg (5min) > 2 then alert
  if memory usage > 75% then alert
  if swap usage > 25% then alert
  if cpu usage (user) > 70% then alert
  if cpu usage (system) > 30% then alert
  if cpu usage (wait) > 20% then alert

# monitor simbamond
check process simbamond with pidfile /var/run/simbamond.pid
  start program = "/usr/sbin/service simbamond start" with timeout 60 seconds
  stop program  = "/usr/sbin/service simbamond stop"
  restart program = "/usr/sbin/service simbamond restart" with timeout 60 seconds
  if cpu > 60% for 2 cycles then alert
  if cpu > 80% for 5 cycles then restart
  if totalmem > 200.0 MB for 5 cycles then restart
  if children > 250 then restart
  if loadavg(5min) greater than 10 for 8 cycles then stop
  if 3 restarts within 5 cycles then timeout
  group mopi
###############################################################################
You can then see what's going on by either or both of
- cat /var/log/monit.log (grep simbamon ... is also useful)
- pointing your browser at http://my-pi-ip-address:8888 (if you need to find your IP address various methods are discussed here)
This is great for keeping check on things during load testing (particularly heavy loads which have a tendency to cause odd corner case bugs to trigger), but it is also a great tool for maximising service availability — the configuration code above will restart SimBaMon within a couple of minutes should it ever crash, for example.
Enjoy...
Footnotes
- Again confusingly — this will become a theme — the names of the files as they live in the source package are different from their names when installed. If you don't like being confused, you might want to avoid talking to computer people as a general rule. For example, the MoPi board works on milivolts; the I2C communication uses centivolts; the user interface uses volts; the API uses milivolts. And all for good reasons!
- And no one complained about the whitespace rules! Who'd have thought it?!
- In common with most daemons, SimBaMon is written in shell script.
- Configuration provided by the user overrides the jumper for the current power cycle — and beyond, when SimBaMon is running as the daemon will persist the config values. The firmware reads the jumper at each power up and initializes the cut-off points with Ni-MH or Alkaline values.