OK, it's been a while. For those that don't remember, the AirPi is a low-cost weather station add-on project for the Raspberry Pi. I've previously written about building it from scratch, soldering it up, and then most recently interpreting sensor readings. Since then I've been working on making those readings more accessible.
That's the beauty of open source software and projects really. Tom Hartley (the AirPi guy) posted their software on GitHub, an open software source code repository. I forked it, or created a copy of the code, to make my own modifications. After two months of on and off again changes and testing, I feel it's about as done as it's going to get.
My goal here is to introduce everyone to what I think are the really nifty things I've added in. I've fixed a few bugs in the original code as I've found them. I've also then fixed the bugs I introduced myself in the new code, but we can gloss over them... The big fix I think is the high CPU load the software had, which only needed the addition of a simple time.sleep() to make it more reasonable.
The first of the new features is Raingauge Support. Previously I looked at them, and now I've translated the logging code I wrote there and applied it to the AirPi framework. We've just gotten even more weather-station-esqe. Just connect the raingauge to GPIO pin 17 and ground. In a similar vein I also added back in support for the TGS-2600 Air Quality Sensor and the UVI-01 Ultra Violet Sensor. This was all pretty trivial still. This was all mostly just extensions of what was already there.
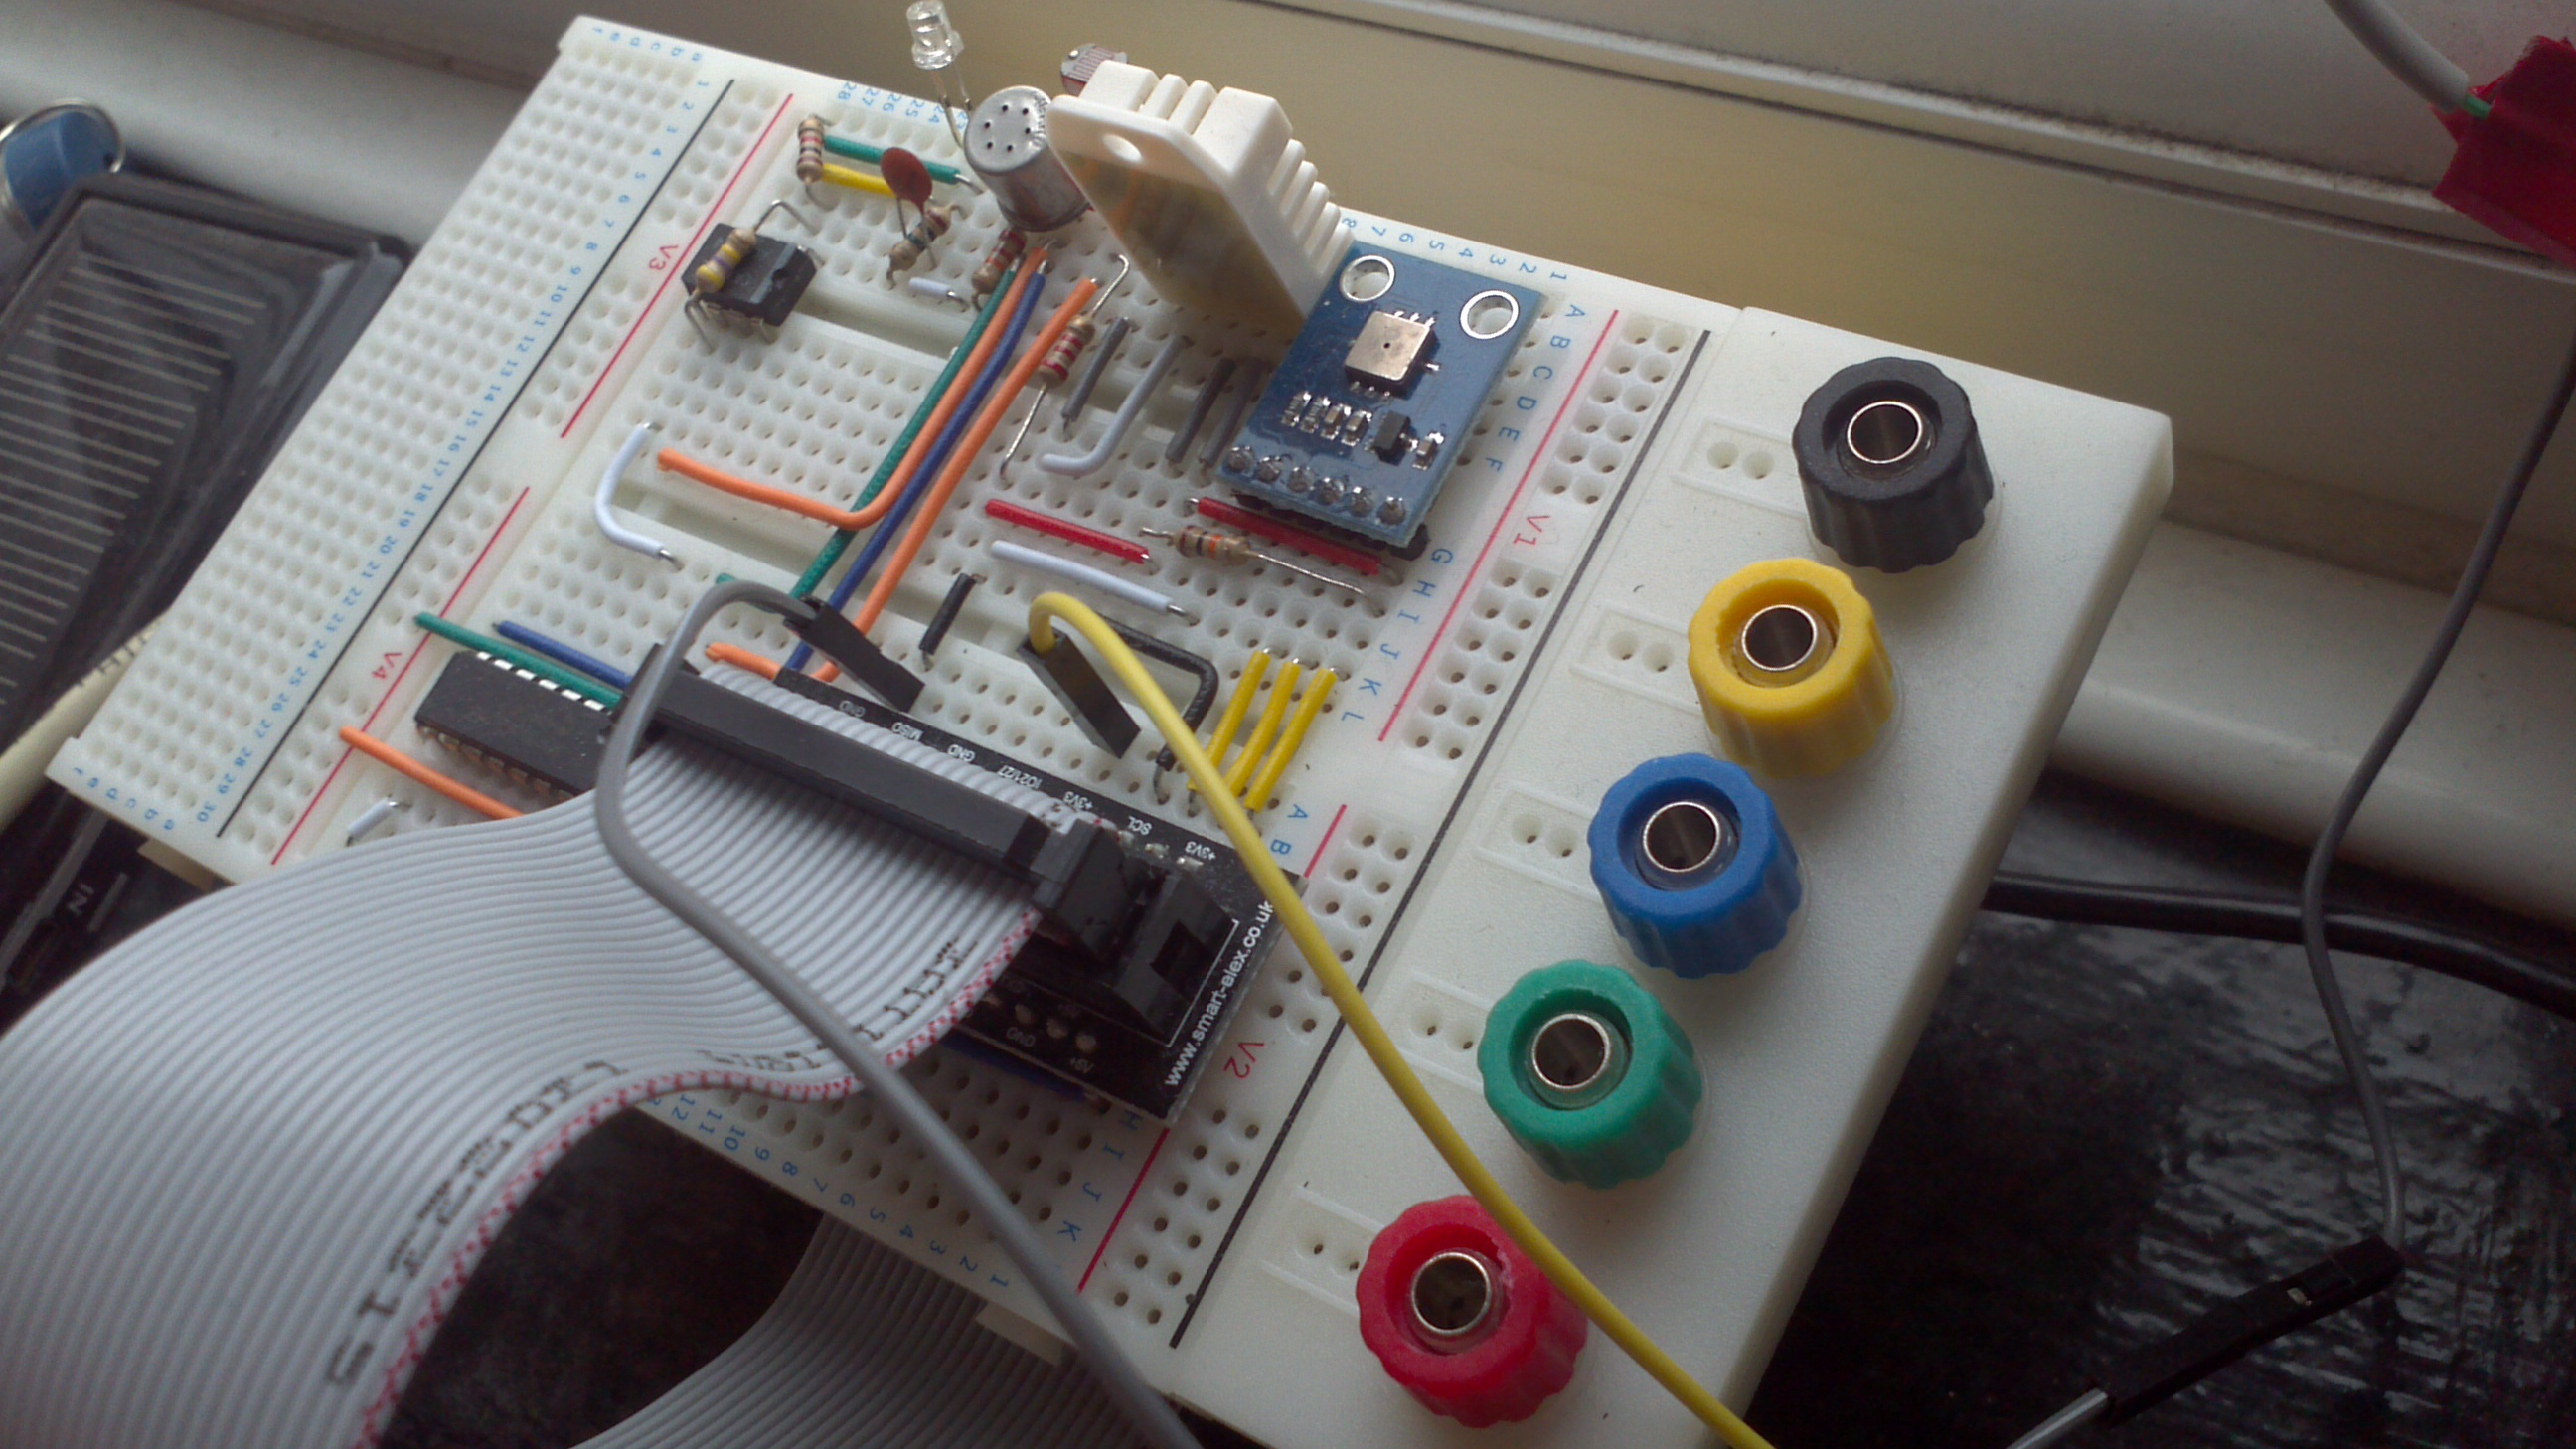 The raingauge connection...
On to more exciting things! Last time I more or less pointed out that a chunk of the sensor readings were uncalibrated. Not anymore! There's now a module that let's the software output calibrated readings. "What's the use?" you might say? Ah well, for starters I also added a CSV output module. The AirPi is now compatible with industry standard file formats... also known as a (comma separated value) spreadsheet. It get's better than that though:
... (wait for it) ... The Crown Jewels:
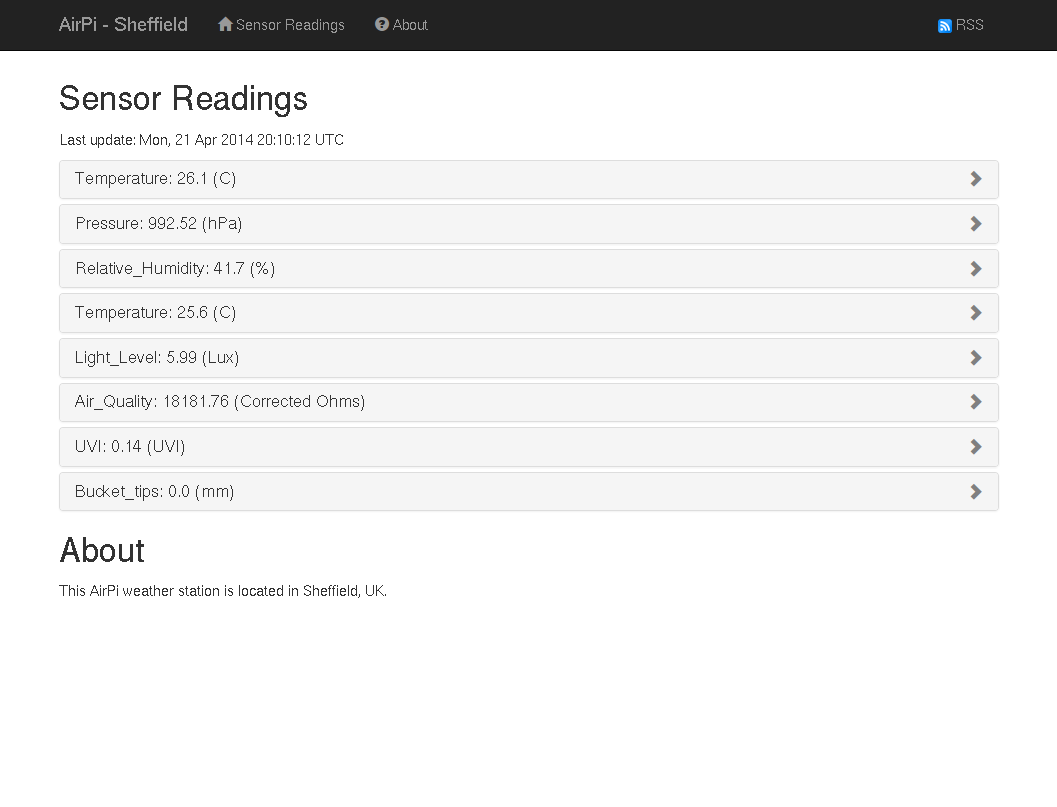
Instead of uploading to Xively, which requires Internet access and relies on a third-party service, I've built in an HTTP server. Starting the AirPi software with this module enabled starts the Pi listening on port 8080 for HTTP requests. Going there loads up a pretty, but fast site that's based on Twitter Bootstrap.
But wait! There's more!
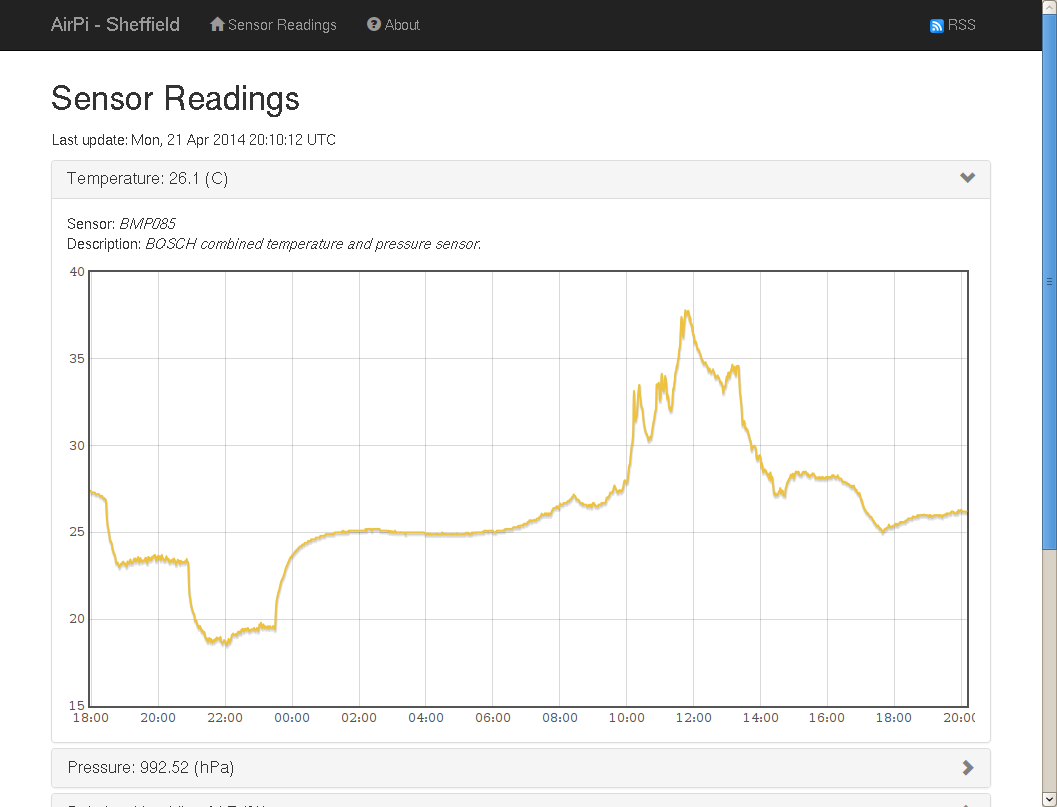
Not only can you see the current reading, you can also view graphs. Interactively explore what the weather's been doing over the last 24 hours with the click of a button. This is of course customizable. You could show the last hour or the last 2 weeks, but longer periods require more free memory and will load a bit slower. Check out our interactive demo site. It's not a real Pi there for reasons of my router being unhappy, but it behaves just like the real thing. Open the drop down to bring up a graph. Select an area on a graph to zoom.
Sharp eyed observes will have also noticed the RSS feed icon in the upper right hand corner. This is to allow for easy export of results to other software. I suspect minimal modifications will allow this JSON output module to be served over HTTP for easy export as well.
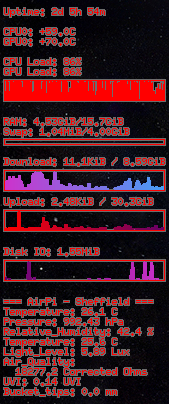
The reason I was after RSS? How many people have heard of Conky? It's a system monitor applet that displays system information on the screen in a corner of the desktop. It's a bit like the gadgets of Windows Vista/7 or OS X dashboard widgets. Well, anyway Conky, like gadgets or widgets, supports RSS feeds.
=== ${rss http://airpi:8080/rss.xml 10 feed_title} ===
${rss http://airpi:8080/rss.xml 10 item_title 0}: ${rss http://airpi:8080/rss.xml 10 item_desc 0}
${rss http://airpi:8080/rss.xml 10 item_title 1}: ${rss http://airpi:8080/rss.xml 10 item_desc 1}
${rss http://airpi:8080/rss.xml 10 item_title 2}: ${rss http://airpi:8080/rss.xml 10 item_desc 2}
${rss http://airpi:8080/rss.xml 10 item_title 3}: ${rss http://airpi:8080/rss.xml 10 item_desc 3}
${rss http://airpi:8080/rss.xml 10 item_title 4}: ${rss http://airpi:8080/rss.xml 10 item_desc 4}
${rss http://airpi:8080/rss.xml 10 item_title 5}:
  ${rss http://airpi:8080/rss.xml 10 item_desc 5}
${rss http://airpi:8080/rss.xml 10 item_title 6}: ${rss http://airpi:8080/rss.xml 10 item_desc 6}
${rss http://airpi:8080/rss.xml 10 item_title 7}: ${rss http://airpi:8080/rss.xml 10 item_desc 7}
Adding the above bit of config to the end of my .conkyrc file gives me this (below) in the upper right corner of my desktop. The weather on my terms. Just what an AirPi should do.